
Crawler Hauler Build
Ever since putting together my camper set up, I have received numerous inquiries wherever I go. I thought it made sense to create a post sharing what I have done, what I like and what I dont. At the time of this writing, the project is still in the works, but it has been used a handful of times. I am finding that this has some benefits. One being that I can still make adjustments that would otherwise be difficult to make with a fully finished interior.
Alright let’s get into the details of the build…


Exterior
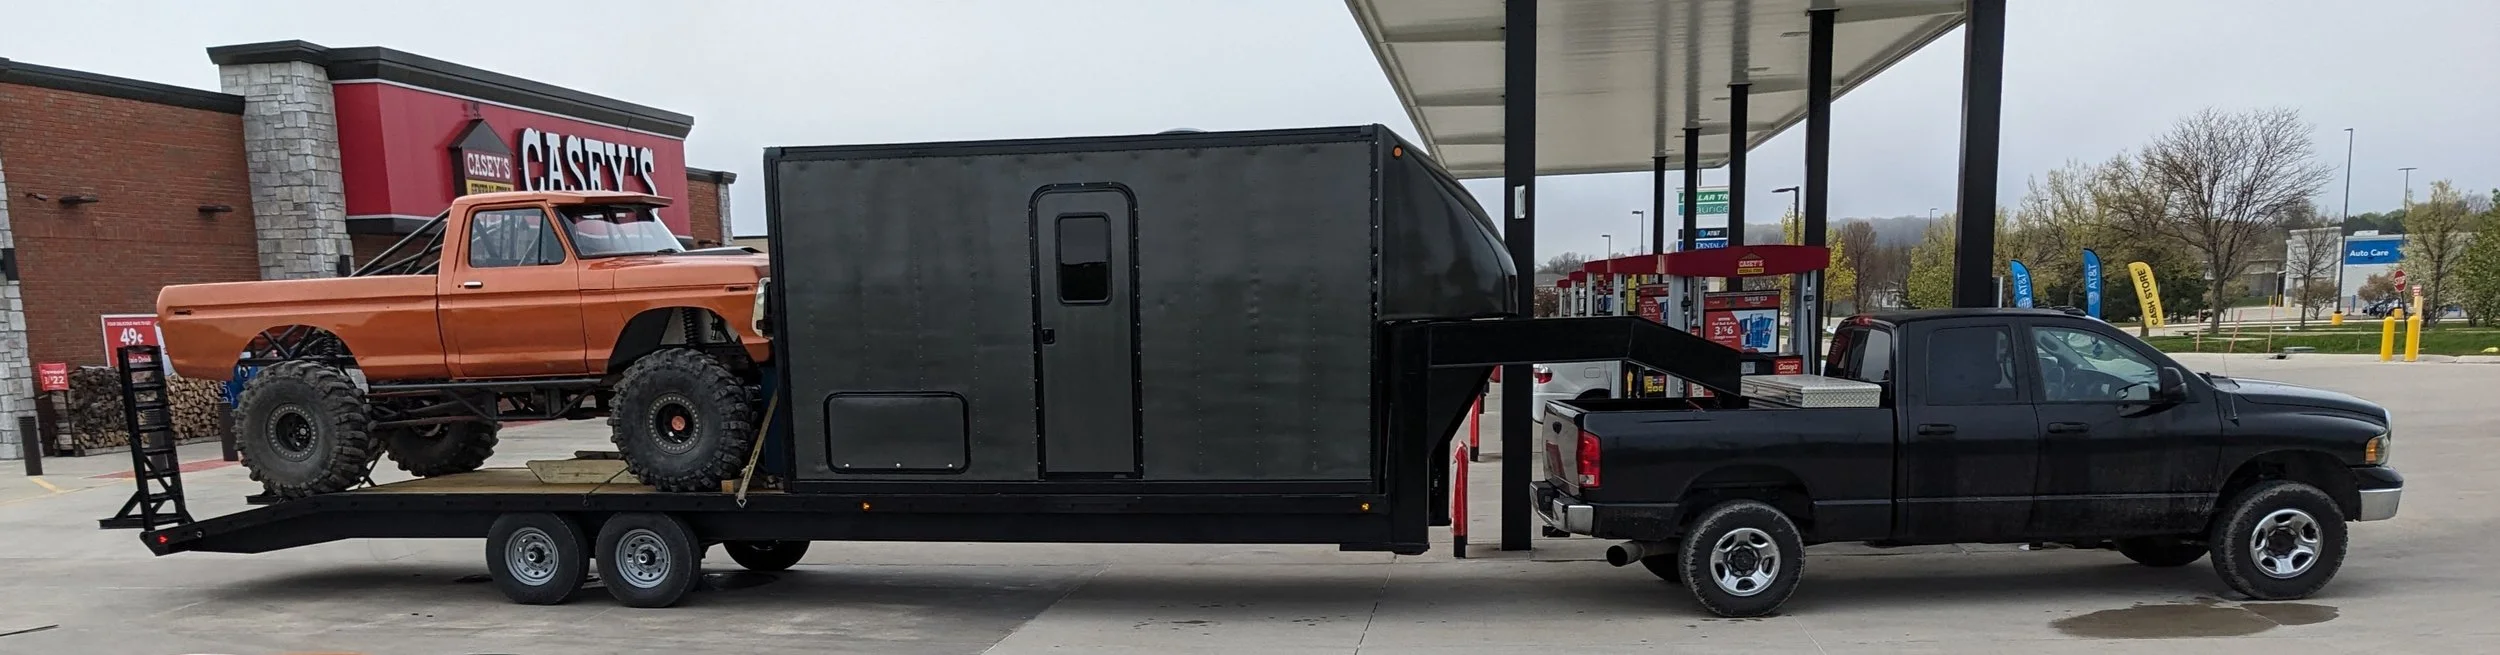
I started by removing the back doors and framed in with ripped 2x4’s (2x2) and paneled with 2 sheets of .030” aluminum to match the other walls. Measured and cut openings for the entry door, two access doors and window. Then I cleaned and scuffed the outside in preparation for paint. I have been using Summit Racing brand automotive paint for a few projects with good results, so I did the same for this. Single stage Gunmetal Gray and Classic Black with a clear sealer. The camper is going to be sitting outside so I wanted to give it the best chance of survival. Once the paint was cured, a clear silicone-based caulk was applied over all seams.
The large access door is intended for tool storage, spare parts and fluids. The idea was that the camper would be stocked with everything required to keep the rig functional without needing to constantly pack and unpack these items every trip. The smaller access door allows filling of the water tank.
Interior
Before framing the inside, every seam was caulked and followed up by a few cans of flex seal. My hope was that this would eliminate any chance of water intrusion. Once all that was dry, spray foam insulation was applied to the walls and ceiling. This was a quick and simple process with the added benefit of sound deadening the aluminum exterior. Framing consists of 1x4’s, some of them ripped into 1x2’s to reduce unnecessary weight. A partition wall separates the shower area for a bit of privacy. This is also used to locate the electric fireplace and will have some shelving built into it at some point.
The camper is wired for 30-amp service. All AC powered appliances have their own breaker, allowing them to be turned on or off as needed. For example, the water heater is only turned on when needed for showering. Inside and outside lighting is LED to keep current draw low. Lights, water pump, fan, refrigerator and USB ports are all 12V. A single 100Ah LiFePO4 battery is plenty to power all this. I do recommend the LiFePO4 type lithium battery as it has great capacity, allowing almost a complete drain as opposed to lead acid. A 20-amp charger keeps the battery juiced up. I also have a 20-amp DC-DC charger that was intended to keep the battery topped off while driving but hasn’t been hooked up yet and might not be as the battery capacity is plenty for long 12hr trips. A small battery monitor allows me to keep an eye on usage as well as charge or time left on the battery.
Amenities
There is a queen bed with a twin bunk. The idea here is that the camper can allow 2-3 to sleep comfortably. The 42-gallon water tank is located under the bed. I chose this location opposed to under the trailer, so I never had to worry about freezing temps. 42 gallons seems to be the sweet spot for a 3-day trip for 2 people with efficient water usage. A 54” counter with a bar type sink provides just enough room for cooking and beverage prep. At some point a cabinet will be built under the counter. The 8-gallon hot water tank was placed between the sink and shower to minimize water waste and provides plenty of hot water for showers. After using the camper a few times, a 5 or 6 gallon would be sufficient for 2 people to shower back-to-back. I chose this option over a tankless as it provides better control of the water temp and only needs 10-15 minutes to heat up. It also keeps warm water for quite a while once shut off.
The shower is 32” x 32”. If I did it over, I would get the slightly larger 34” or 36” options for a little more space. The fridge/freezer is 42 quart and worth every penny. Being able to keep food cold and make endless amounts of ice cubes is just awesome. It can easily fit a 30 pack plus food for a 3-day trip. It will also run for hours on a fully charged battery once cooled down. The fireplace is 1500W and can easily heat the camper on chilly nights and with a little flare. Pun intended. An 18W rooftop fan keeps air moving through the camper. I would suggest getting a quality fan as this has worked great on warmer days. However, I do plan to install A/C at some point.
There it is. Everything about the camper build as it is today. This post will be kept up to date as I finish things up. I hope this is helpful for those looking to build something similar.
Dimensions
Box outside dimensions: 8’ x 8’ x 14.5’
Overall height on trailer: 13’ (3’ trailer + 8’ box)
Overall length of trailer: 32’
Overall weight of setup: 15,000lbs (camper, trailer & truck)
Entry door: 28” x 78”
Large access door: 42” x 22”
Small access door: 18” x 12”
Window: 24” x 15”
Rough Cost Breakdown
Van Box: $800 (includes back wall panels, screws/rivets, caulk, paint, etc. Box was free)
Doors/Windows: $415
Interior Framing: $450 (beds, counter, wall)
Appliances: $1600 (fridge, water heater, water tank, shower, fan)
Electrical: $650 (breaker box, breakers, chargers, fuse block, monitor, wiring, battery, lights)
Plumbing: $120 (pex tubing, fittings, pvc)
Total: $3,630
Quick note on the trailer…
This was a 25’ 14,000lb trailer that I picked up from the neighboring farmer. It was a bit rough, but for $1,000 how could it be a bad deal. 7ft was added to make it 32’, allowing just enough room for the camper box and truck. It’s only decked where the truck sits.